Table of Contents
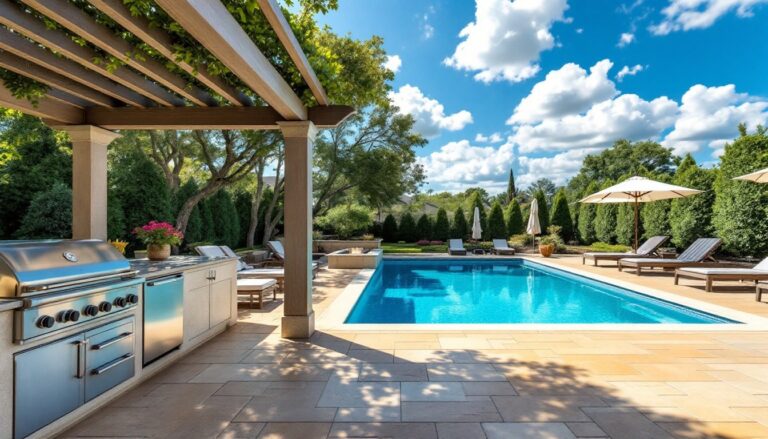
ToggleAn outdoor kitchen and pool combination transforms a backyard into a genuine entertainment destination, not just a place to cool off on hot days, but a functional living space where families gather year-round. The appeal is straightforward: cook meals steps from where guests are swimming, serve refreshments poolside, and eliminate trips back into the house. In 2026, integrated outdoor kitchen and pool designs have matured beyond novelty, with practical layouts, durable materials, and smart spatial planning making these projects achievable for homeowners willing to invest time in the upfront design phase. Whether you’re starting from scratch or adding a kitchen to an existing pool, the difference between a chaotic layout and a seamless one hinges on thoughtful planning.
Key Takeaways
- An outdoor kitchen and pool combination transforms your backyard into a year-round entertainment destination by eliminating trips inside and enabling you to cook and serve meals steps from where guests are swimming.
- Successful planning requires measuring your yard, understanding that pools need at least 15×30 feet of space while kitchens need 200+ square feet, and budgeting $35,000–$60,000 for modest setups or $100,000+ for premium installations.
- Position the outdoor kitchen on or slightly raised from the pool’s edge with a 6–8 foot distance for optimal safety and sightlines, and create a 4-foot-wide traffic path to prevent single-file navigation.
- Essential outdoor kitchen equipment includes a gas grill, outdoor-rated refrigeration, a stainless steel sink, 3–4 linear feet of counter space, and cabinetry made from marine-grade or powder-coated materials that withstand moisture and salt air.
- Choose durable deck materials like stamped concrete or porcelain tiles with slip-resistance ratings, install proper drainage and underlayment before construction, and protect appliances with covers and retractable shade structures to extend their lifespan.
- In freezing climates, winterization is essential—drain and insulate water lines, shut off gas supplies safely, and use proper pool covers rated for snow load to prevent costly damage to your outdoor kitchen and pool investment.
Planning Your Outdoor Kitchen and Pool Layout
Assessing Your Space and Budget
Before ordering a single material, measure your yard carefully. Grab a 50-foot tape measure and note down the lot dimensions, existing structures (fences, trees, property lines), sun exposure throughout the day, and drainage patterns. A pool typically requires a minimum 15×30 feet of space (though smaller plunge pools work on tighter lots), while an outdoor kitchen island or built-in prep area needs at least 200 square feet of clear, level ground adjacent to the pool.
Budget realism matters here. A modest combo, a concrete pad with a gas grill, built-in cooktop, and a small saltwater pool, runs $35,000 to $60,000 depending on region and soil conditions. Premium setups with tile work, wood cabinetry, multiple cooking appliances, and a larger saltwater or heated pool push $100,000 and up. Permits, inspections, and site prep often eat 15–20% of the total cost, so don’t skip those expenses in your estimates. Getting quotes from at least three contractors helps you understand regional pricing and what’s included (utilities, drainage work, equipment delivery).
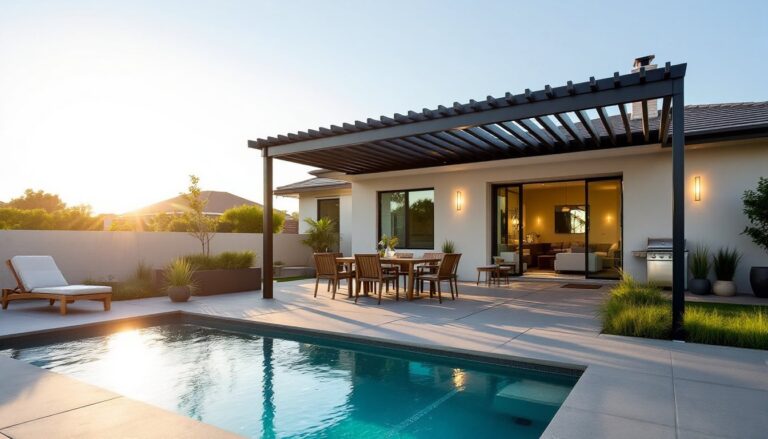
Creating a Cohesive Design Flow
Layout is king when combining a kitchen and pool. The best designs position the kitchen on the pool’s edge or just slightly raised so cooks face the water and guests. This sightline matters for both safety and social reasons, you’re never more than an arm’s reach from the action. Avoid burying the kitchen deep in a corner where you’ll feel isolated.
Use zoning to manage traffic. Place the main cooking zone 6–8 feet from the pool edge (not right on it, water splash and heat don’t mix well). Create a bar or beverage station closer to the pool as a transition zone. A wide deck or patio unites the kitchen and pool visually: seasonal pool service knowledge helps ensure your deck drainage doesn’t dump water into the pool itself. Plan for at least a 4-foot-wide path between the kitchen and pool entrance so people aren’t navigating in single file.
Essential Outdoor Kitchen Features and Appliances
Must-Have Cooking Equipment
A functional outdoor kitchen starts with the grill. A gas grill (30–36 inches wide) is the workhorse: propane hookups are cheaper and safer than running natural gas lines in many areas. If you cook frequently, consider a grill with side burners, these handle sauces, warming sides, or boiling water without firing up the main burner. An integrated cooktop (gas or electric) adds serious cooking flexibility if you’re building cabinetry: specify how many burners suit your meal prep.
Refrigeration is non-negotiable. An outdoor-rated refrigerator (beverage cooler or full-size) keeps drinks cold and ingredients fresh. These units cost $1,000–$4,000 depending on size and features: standard kitchen refrigerators degrade quickly outdoors due to humidity and temperature swings. Pair it with a sink (stainless steel, 18–24 inches) for hand washing and food prep. Hot and cold water lines must be insulated and drained at the seasonal low point if you live where winter temperatures drop below freezing.
Storage and work surface come next. Outdoor cabinetry (powder-coated steel, teak, or marine-grade composite) resists rust and rot. Aim for 3–4 linear feet of counter space minimum: outdoor entertaining deck planning reveals that open space around the kitchen encourages socializing. Granite, teak, or sealed concrete countertops handle heat and moisture better than laminate. Finally, a small ice maker or built-in ice chest becomes almost essential if you host regular poolside gatherings.
Pool Design and Integration with Your Kitchen Area
The pool itself should complement the kitchen’s footprint and style. A rectangular 15×30 saltwater pool is the sweet spot for most residential yards, it’s forgiving to maintain, gentler on skin and eyes than chlorine, and looks modern without screaming “resort.” Does a Pool Add Value to Your Home? research shows that well-maintained pools in the right climate recover about 50–70% of their cost at resale, so choose materials and finishes that’ll age well.
Consider the kitchen-to-pool sightline and distance carefully. A shallow sun shelf (2–3 feet deep) near the kitchen acts as a cooling-off zone and lets kids wade safely without needing constant supervision. This shelf should run along one long edge and connect visually to your entertaining space. If your kitchen sits on a slight elevation, a few steps down to the deck level prevent tripping and frame the pool as a landscape feature.
Water features, fountains, jets, or a small waterfall, add ambiance and hide mechanical equipment noise (pumps, filters). Position these away from the kitchen to avoid water spray on food prep areas. Home Pool: Transform insights emphasize that pool lighting (LED, color-changing, and low-voltage) transforms evening entertaining: run electrical conduit before decking or landscaping goes in.
Deck materials tie kitchen and pool together. Stamped concrete, pavers, or large-format porcelain tiles unify the space and resist slipping when wet. Avoid small tiles, they trap dirt and algae in grout lines. Specify slip-resistance ratings (ASTM D2047) if you live anywhere with a freeze-thaw cycle or heavy rainfall.
Materials, Weather Protection, and Durability
Outdoor conditions are unforgiving. All kitchen cabinetry and appliances must be rated for exterior use, not just “weather-resistant” but actually installed in sun and rain. Marine-grade or powder-coated stainless steel handles salt air and humidity far better than standard stainless. Check product specs for UV stability: cheap finishes fade and peel within two years.
Underlayment and drainage prevent future headaches. Before pouring concrete or laying pavers, install a compacted base (4–6 inches of crushed stone) to handle water runoff and prevent settling. Concrete pads should slope gently (1:100 gradient) away from the pool and kitchen so water doesn’t pool. If your lot has poor drainage, you may need a perforated drain line running to daylight or a sump pit, this is where permits and inspections earn their weight.
Cover and protection systems extend the season and protect appliances. A retractable pergola or shade cloth over the kitchen prevents heat buildup and glare while keeping rain off the grill. Covers for grills and appliances ($200–$800) add years of life. In freezing climates, winterizing water lines, shutting off gas supplies safely, and covering the pool (with a proper winter cover rated for snow load) is not optional.
Wood elements add warmth but demand maintenance. Teak, cedar, and redwood resist rot, but they’ll gray without regular sealing. Apply a penetrating UV protectant every 12–18 months if you want to keep that golden color. Composites (like trex-style decking) offer lower maintenance but cost 2–3 times more than pressure-treated lumber. Budget your time and money accordingly. Pool Maintenance Made Easy: guidance applies to keeping surrounding decks clean and safe, not just the water itself. Simple concrete and sealed pavers are often the smartest choice for low fuss and decades of life.