Table of Contents
ToggleAn Intex rectangular pool brings summer fun right to your backyard, but the deck surrounding it makes all the difference. A well-designed Intex rectangular pool deck turns a functional swimming area into an inviting outdoor retreat where family and friends actually want to spend time. Whether you’re working with a tight budget, limited square footage, or specific climate challenges, there are practical deck solutions that don’t require a contractor’s license. This guide walks you through material choices, layout strategies, shade options, and budget-friendly upgrades that transform your pool area into a genuine oasis.
Key Takeaways
- Intex rectangular pool deck success depends on choosing the right material—composite decking ($8–15/sq ft) offers durability and low maintenance, while pressure-treated lumber ($2–5/sq ft) provides budget-friendly options requiring annual sealing.
- Plan deck layout in zones with a minimum 4-foot safety perimeter, wider lounging areas (8–10 feet) on one side, and a gentle 1–2% slope away from the pool to prevent water pooling.
- Shade solutions like umbrellas, pergolas, or mature trees are essential since full-sun deck temperatures can exceed 140°F, and lighter-colored materials stay 10–20°F cooler than dark finishes.
- Integrate storage, stairs, and organized cable management into your rectangular pool deck design to eliminate clutter and reduce trip hazards around the pool area.
- Phase your deck build over time to keep costs manageable—start with the immediate pool perimeter, then expand outward, and DIY finish work like sealing and staining to maximize savings.
- Add evening ambiance with low-voltage LED deck lights and string lights, plus landscaping with moisture-tolerant plants to create a year-round gathering space that extends beyond summer.
Choose the Right Decking Material for Your Budget and Climate
Material selection is the foundation of any deck project. For Intex pools, you’re not anchoring to a concrete pad or permanent structure, so your deck needs to handle shifting ground while staying comfortable underfoot.
Composite decking (wood-plastic blend like Trex or TimberTech) resists moisture and rot, crucial around pool water splash. It costs $8–15 per square foot installed, requires minimal staining, and lasts 25+ years with proper care. The trade-off: initial cost is higher than pressure-treated wood.
Pressure-treated lumber runs $2–5 per square foot and remains the budget-friendly workhorse. Southern yellow pine or treated fir handle moisture reasonably well if sealed annually. Expect to replace boards every 10–15 years. It’s lighter on your wallet upfront but demands ongoing maintenance.
Composite pavers or interlocking concrete work well if you prefer a ground-level aesthetic. They don’t rot, require no fasteners underneath, and allow water drainage. Pavers run $3–8 per square foot and shift slightly over time, which is fine for pool decks where perfection isn’t critical.
Cedar or redwood age beautifully but cost more than pressure-treated ($5–10 per square foot). They’re naturally rot-resistant but still need sealing every 2–3 years to stay vibrant.
Climate matters: hot, humid regions favor composite or concrete to avoid constant rot and mold. Cold climates with freeze-thaw cycles benefit from materials that don’t trap water. Coastal areas need salt-resistant composites or stainless-steel fasteners with any wood option.
Measure your pool’s footprint first. An 12×24-foot Intex pool typically needs decking 4–6 feet on all sides for safe walking space and lounging. That’s roughly 400–600 square feet of surface, plug that into your material calculator for realistic budgeting.
Optimize Layout and Safety Around Your Rectangular Pool
Layout is where comfort and code intersect. Most jurisdictions require a minimum 4-foot-wide safety perimeter around above-ground pools (check your local building department, codes vary). That’s enough for single-file walking without tripping hazards.
For a rectangular Intex pool, plan your deck in zones. A wider deck on one side (8–10 feet) creates a lounging area with room for chairs and tables. Narrow the opposite side (4–5 feet) for access and circulation. This uneven distribution feels more natural and costs less than decking all sides equally.
Consider ground slope. Pools need level footings to stay stable: decks don’t. A gentle 1–2% slope away from the pool (about 1 inch per 4–5 feet) prevents water pooling. Use a long level and a shim to check your sub-base before laying boards.
Spacing matters. If using boards, leave 1/8-inch gaps between them for drainage and expansion. Over-tight spacing traps moisture and causes swelling. For composite decking, follow the manufacturer’s thermal expansion specs, composite expands more than wood in heat.
Install joists perpendicular to your pool edge using 2×8 or 2×10 lumber, typically spaced 16 inches on center. This creates a stiffer platform that won’t bounce or sag under foot traffic. Attach deck boards at 90 degrees to the joists using hot-dipped galvanized or stainless-steel fasteners: regular steel fasteners rust and stain composite or wood.
Rails and gates: Check if your jurisdiction requires deck railings (most do for decks over 18 inches high). Intex pools 52 inches tall often qualify. Balusters must be spaced no more than 4 inches apart to prevent child entrapment. A self-closing gate at pool access adds a safety layer and may reduce homeowner insurance liability.
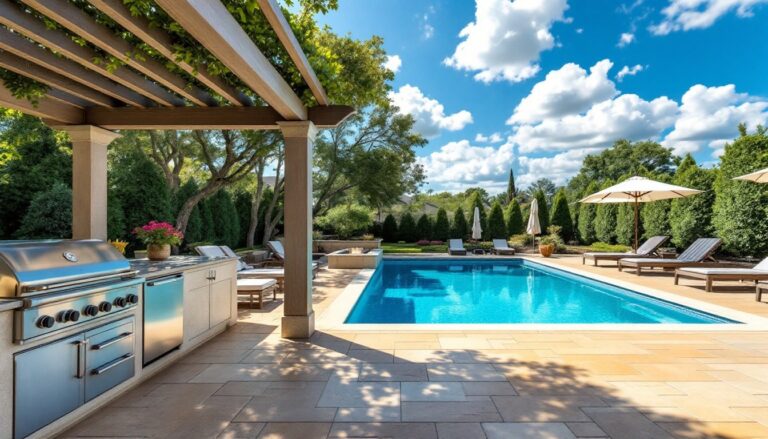
Add Shade Solutions for Comfort and Protection
Full-sun deck environments heat up fast, sometimes to 140°F or hotter. Shade isn’t luxury: it’s practical for preventing sunburn and allowing loungers to rest without baking.
Umbrellas and cantilever options are the DIY-friendly start. A 9×9-foot offset patio umbrella ($100–300) anchors into a weighted base and provides 80 square feet of shade. The advantage is portability: rotate it as the sun moves or stow it in winter.
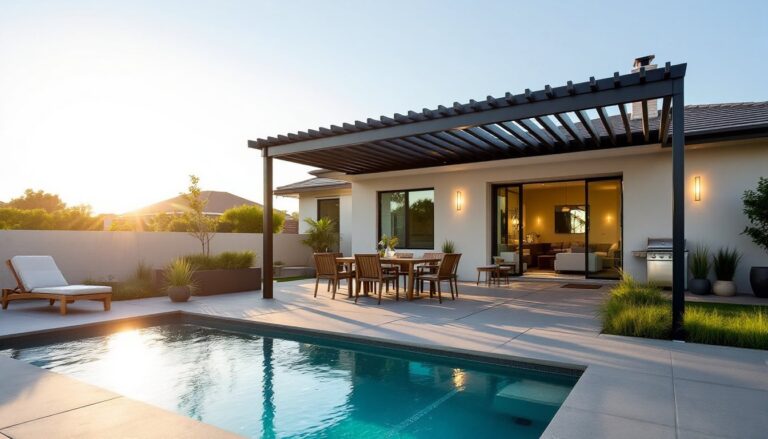
Pergolas or shade sails offer a permanent look. A simple 12×12-foot pergola frame ($300–800 in materials) assembles on the deck with 4×4 posts sunk into concrete footings. Shade cloth or retractable canopy panels attached to the frame reduce sun exposure by 50–75%. This is structural work, verify your deck framing can handle the added load (a typical pergola adds 15–25 lbs per square foot when loaded with fabric).
Shade structures should orient to block afternoon sun (west-facing) while allowing morning warmth. If your deck runs east-west, a pergola on the west side works better than covering the entire deck.
Tree planting is a slow play but highly effective. A single mature tree (15+ years growth) casts 1,000+ square feet of shade. Plant deciduous trees (maple, oak) 10–15 feet from the pool’s uphill side so debris doesn’t constantly fall into the water. Evergreens are problematic near pools due to needle drop and root systems that heave deck boards.
Do not underestimate heat reflection. Lighter-colored decking (tan composite, light-gray concrete) stays 10–20°F cooler than dark finishes. If replacing boards, consider this in your material palette.
Incorporate Storage and Functionality Into Your Design
A pool deck without storage becomes cluttered. Loungers, noodles, floats, and chemical supplies pile up fast.
Under-deck storage boxes mount directly beneath the deck structure and hold pool toys, towels, and maintenance gear without eating into deck surface area. Pre-made resin boxes ($200–500) resist moisture and UV. Building a simple wooden bench with lift-top storage ($50–150 in materials) serves double duty: seating plus hidden compartment.
Deck stairs or entry steps are non-negotiable for safe pool access. A 3–4 step platform built from pressure-treated 2×12s ($100–200 in lumber) attaches to the deck frame and makes entry/exit smooth. Include a handrail (2×4 post with 1×6 rail) anchored to the frame. Metal or composite railings cost more but won’t splinter or require staining.
Poolside tables and bar carts keep drinks, snacks, and sunscreen within arm’s reach. A small side table (2×2 feet) on the deck doesn’t require permanent installation, just choose weighted, slip-resistant feet so it doesn’t slide in wet conditions.
Integrated seating reduces the footprint needed. A 6-foot-long deck bench built perpendicular to the pool edge seats 3–4 people and anchors into the joist frame. Slat-style benches (like those at an outdoor theater) allow water to drain instead of collecting on flat seats.
Cable trays or clips for pump/filter management keep electrical cords, hoses, and chlorine buckets organized. Run cables along the deck edge or underneath to reduce trip hazards. Use outdoor-rated cord covers if cables cross foot traffic zones.
Create Ambiance With Lighting and Landscaping
Evening enjoyment extends your pool season. Landscape lighting and plantings tie a deck into the broader outdoor aesthetic.
LED deck lights embed flush into deck boards or mount along the perimeter rail. Low-voltage systems (12V) are safer than 120V and run on battery backup if desired. Warm white LEDs (2700K) create an inviting mood: bright white (5000K) suits safety-critical zones like stairs. A 20-light solar deck kit runs $100–250 and requires minimal wiring.
String lights and bistro café lights drape overhead (often attached to a pergola or post) and cost $30–80. They’re not waterproof, so position them above head height and away from standing water. Replace bulbs seasonally to avoid breakage in winter.
Poolside landscaping softens hard deck edges. Plant
Mobile Home Patios and decks often benefit from low-growing, moisture-tolerant plants like ornamental grasses or shrubs. Avoid trees that drop fruit or pollen near the water. Use raised planters on the deck itself if in-ground planting isn’t possible, choose heavyweight plastic or composite pots that won’t tip in foot traffic.
Hardscaping accents, stepping stones, edging, or pavers, define zones and add visual interest. A curved planting bed adjacent to the deck creates softness against rectangular lines.
Lighting and landscaping don’t require permits and can be staged over time. Start simple with a few string lights and solar stake lights, then add permanent fixtures or plantings as budget allows.
Budget-Friendly Tips for Building or Upgrading Your Pool Deck
Not every upgrade requires a full rebuild. Phased improvement keeps costs manageable.
Phase your deck build. Construct the immediate pool perimeter (4–5 feet) first using pressure-treated lumber ($2–5/sq ft). Once sealed and proven stable, expand outward with lounging areas. You spread costs across years and adjust design based on how you actually use the space.
DIY the finish work. Sealing, staining, and fastening are beginner-friendly tasks. A one-gallon sealant ($30–50) covers roughly 400 sq ft and extends wood life by years. Pressure washers ($200–400 to buy, or rent for $40/day) blast away mildew and old sealer before reapplication.
Reclaimed or discount materials cut costs. Pressure-treated overstock lumber at big-box stores (often 10–20% off) and composite deck boards with cosmetic flaws (slight color variation) perform identically to premium grades. Simple Deck Designs often skip high-end finishes and focus on solid framing.
Rent versus buy tools. A miter saw ($300–500) sits idle after a deck build. Rent one for $30–50/day when you need it. Same with pneumatic nailers, pressure washers, and laser levels.
Labor is your biggest variable. Hiring a contractor costs $50–150/hour: you save that entirely by doing the work yourself. A DIY rectangular deck (400–600 sq ft) built in phases over a month or two is realistic for handy homeowners with basic carpentry experience.
Skip cosmetic upgrades initially. Composite decking looks premium but isn’t necessary year one. Pressure-treated boards sealed properly stay functional for over a decade. Upgrade to composite later if budget improves or if maintenance becomes burdensome.
Check with local recycling centers or building salvage yards for reclaimed wood or composite materials at steep discounts. One homeowner’s deck teardown is another’s raw material.
Remember: Home Depot Decks and Lowe’s often run sales on deck materials in spring (March–May) and summer (June–July). Build during off-peak months (fall/early spring) when contractor availability increases and supply prices may dip.
Conclusion
Building or upgrading an Intex rectangular pool deck isn’t one-size-fits-all. Start with honest assessment: your budget, climate, and how you’ll use the space. Choose durable materials that match your maintenance tolerance. Design for safety and function first, then layer in shade, lighting, and personality. A well-planned deck extends pool season enjoyment and creates a gathering spot that gets used year-round. Begin with framing and decking, then upgrade landscaping and ambiance gradually. That phased approach keeps costs realistic and gives you time to refine the design as you live with it.